A young man left a comment on this blog requesting information about one of Joe’s trailers and the boom. He has read my blog for the past year while he has been engaged doing Drive-Away himself. I don’t know if he is doing singles only right now and is looking to have a way to increase his income.
In the past nine months I have received two requests for information. Joe got in touch with each person and I think the price scared them off. A new trailer is $35,000. A used trailer is $15,000. The boom is $8,000 and would be newly manufactured. My boom is the only used one and it is not for sale.
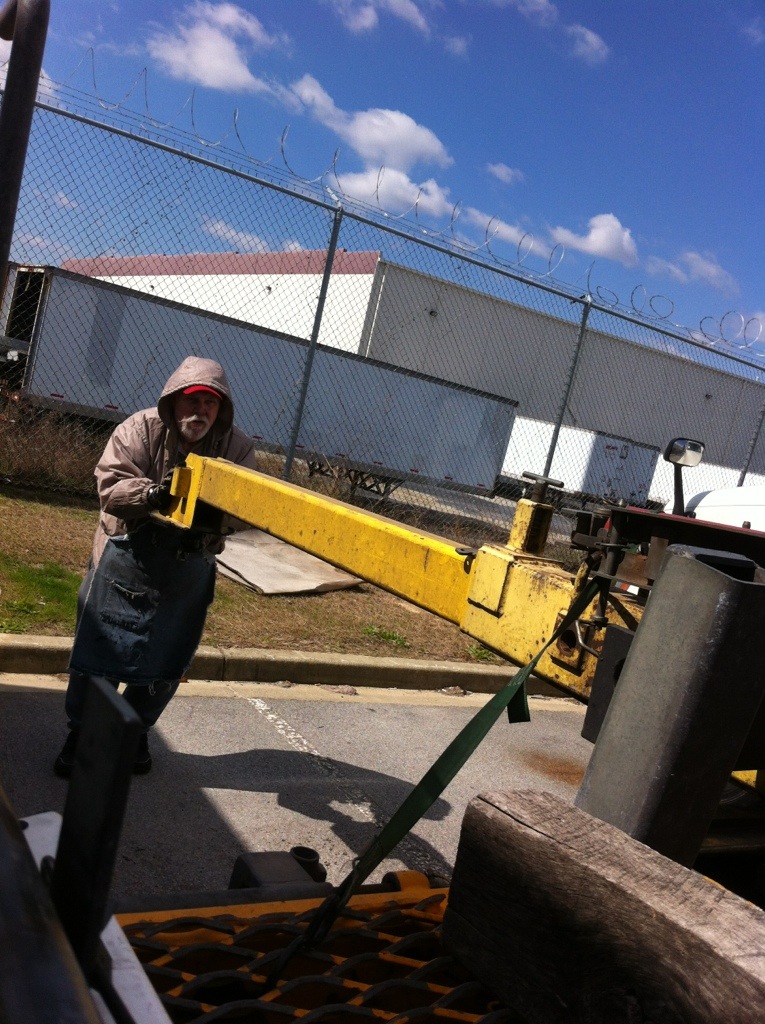
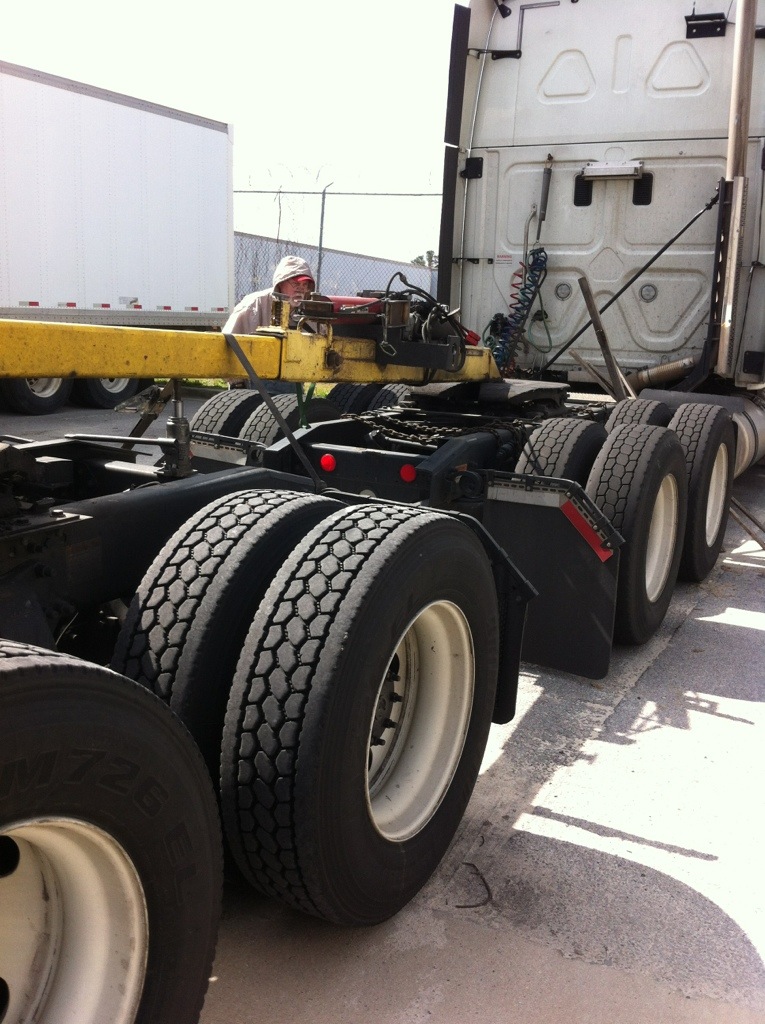
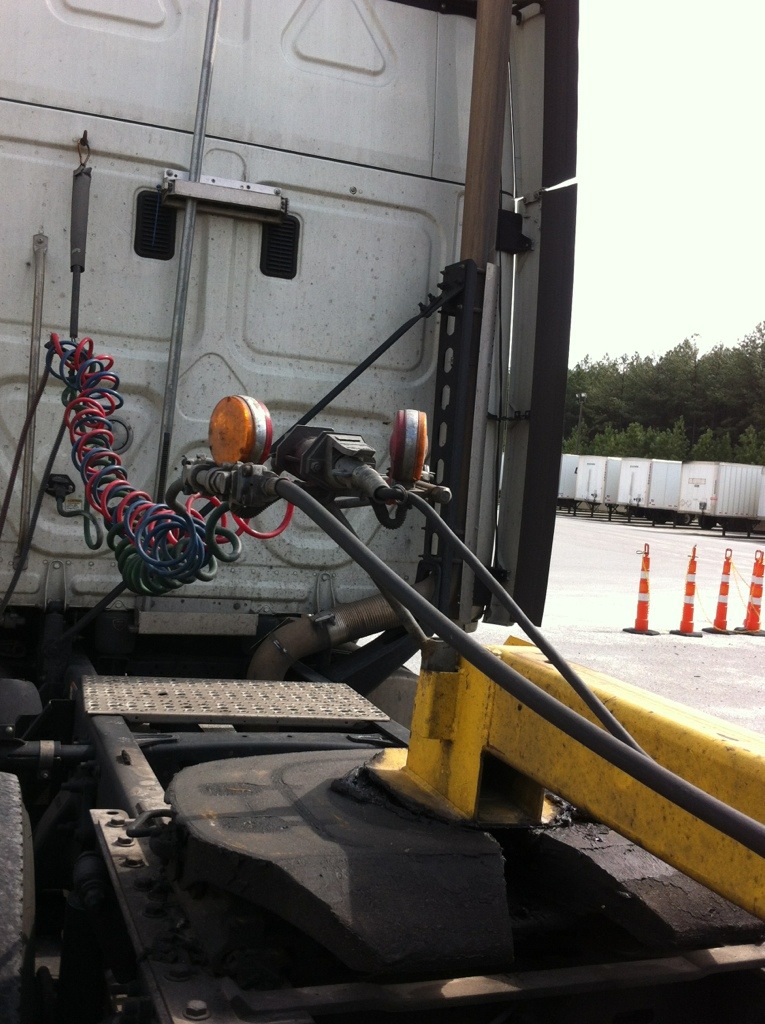
I will take you through the process of working with the boom. The photos I am using were taken during the process of unhooking. It is the same, only backwards.
The boom is secured to our trailer with a 2″ x 10 foot ratchet strap. There are “ears” on the trailer to facilitate the attachment of the straps.


The ratchet mechanism is secured on the underside of the trailer.

There is a “Safety Locating Pin” located on the top surface of the boom. This pin is raised to allow the boom to be pulled out. Once the boom has been pulled about a foot out the pin is set to automatically drop in the “Locating Hole”.

Pulling on the boom, to extend it out, the “Locating Pin” scrapes along the surface until the “Locating Hole” is found and the pin drops in the hole.

Pulling the boom apart.

There is a “Carry Pin” to keep both sections of the boom together. A reinforced 1-9/16″ hole has been drilled through both of the boom pieces. The Carry Pin measures 1-1/2″ by 8″.

This is the Carry Pin.
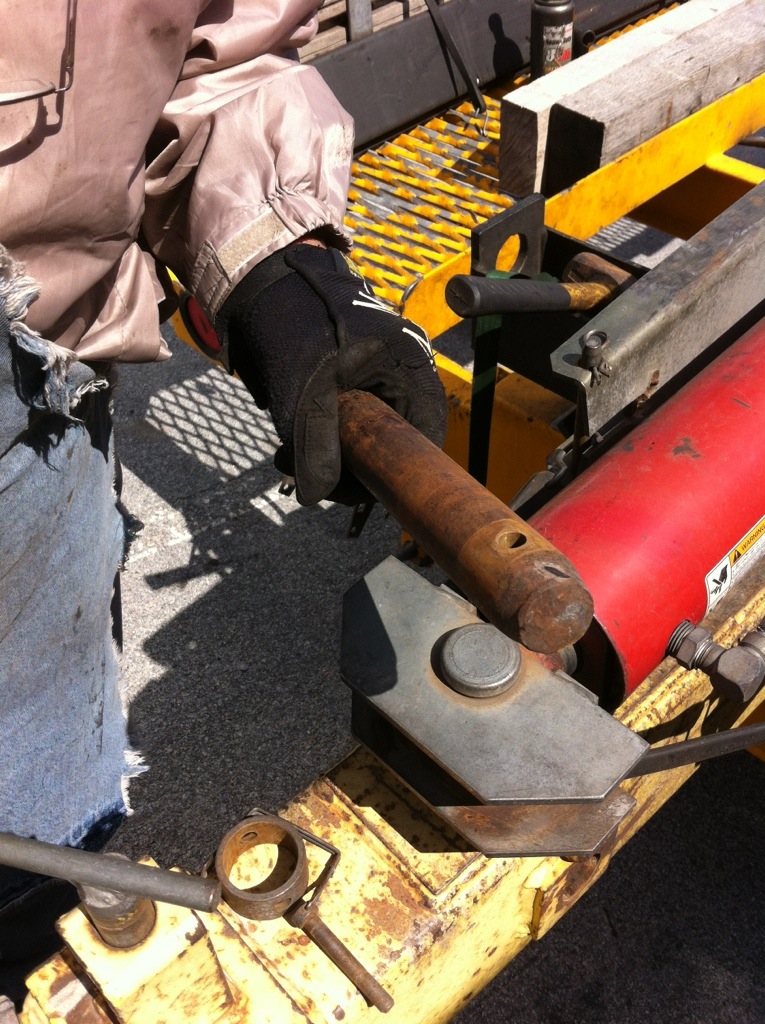
The pin goes through the boom to extend out the other side.

A “Collar” and “Safety Retaining Pin” are attached to the Carry Pin.

These are photos of the Carry Pin application.


Next is to attach the “King Pin” of the boom into the 5th Wheel of the truck to be driven.

I forgot to include a 6,000 pound jack and 2″ ratchet strap set in the list from yesterday’s post.
The ratchet strap is attached to the rear truck frame and crossed over the boom to be hooked up on the other side of the frame. The “Bottle Jack” is positioned on the rear frame cross member and centered beneath the boom. The jack is raised to allow the King Pin on the other end of the boom to clear the holding pan we have on our trailer.


Once clear the ratchet strap is tightened down on the jack and frame. The truck is now ready to be attached to the truck it will be towing.
First, there is a bit of work to be done to the back truck.
While the hood is closed the light bar is first to be mounted. Rubber bungees are included.

The electric and air lines are drug out and stationed along the passenger side of the truck.

The electric line is run under the hood, draped over an engine pipe thing then run out the hood and attached to the light bar.


The airline goes over the engine to the other side for the quick disconnect procedure.
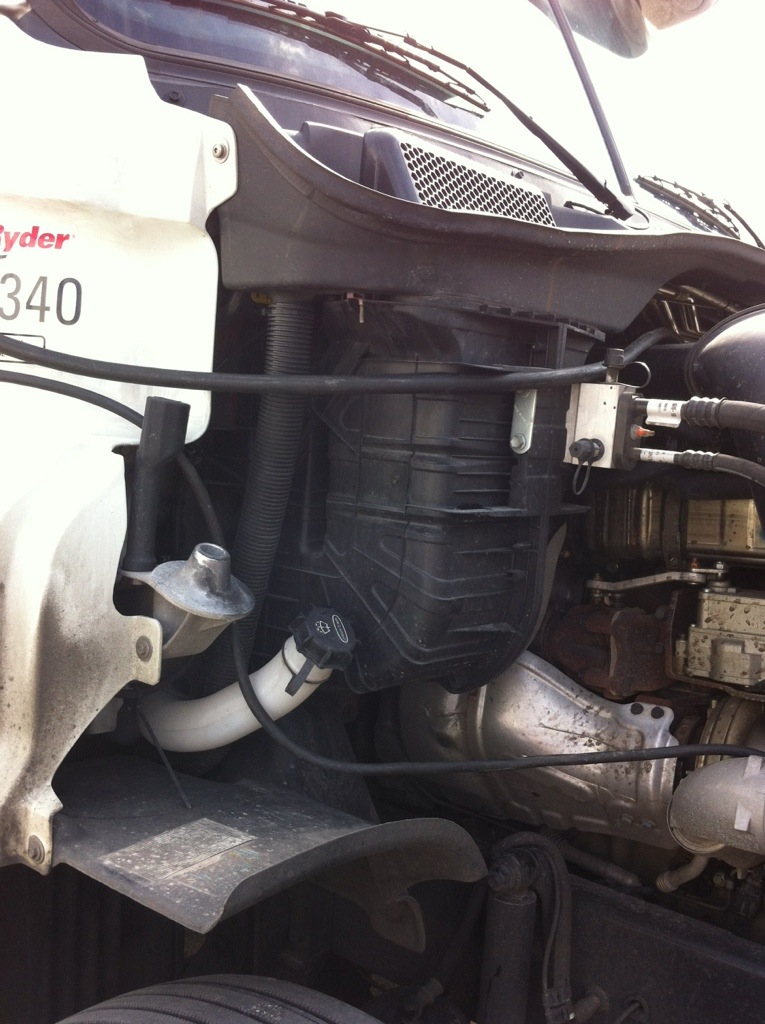
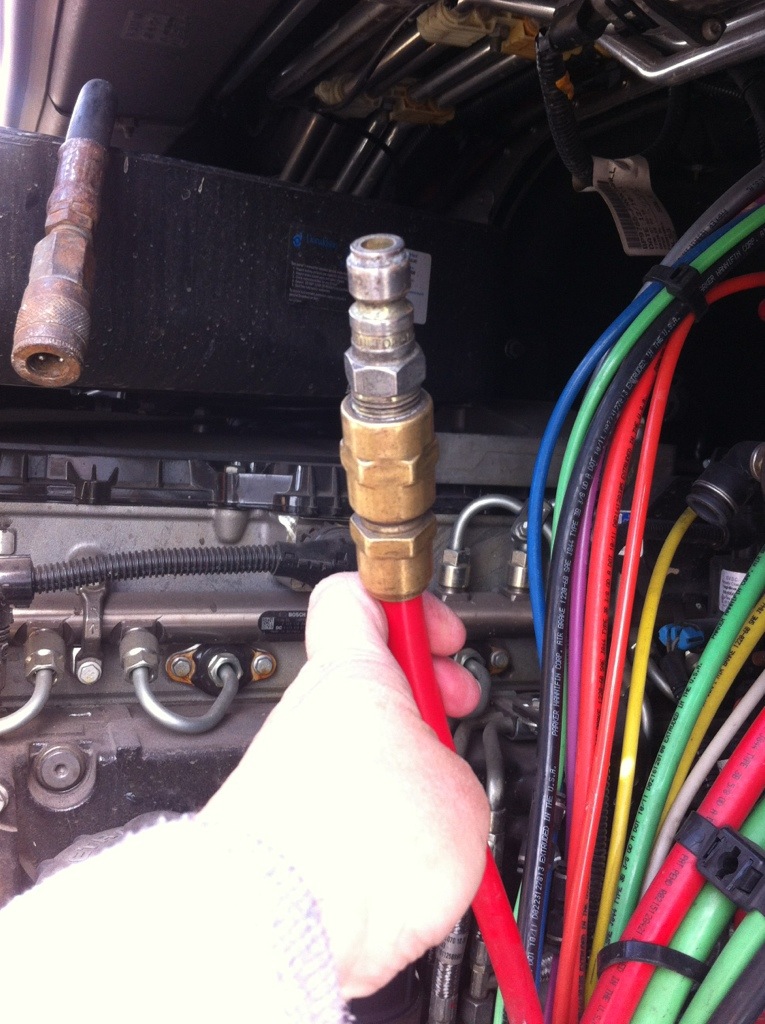
On the fire wall is a huge batch of air lines. Knowing the correct line to disconnect has been won through trial and error.

Once the proper line is disconnected the quick disconnect coupling device is attached to the red air line then coupled to the black air line.

With that done, give a little tug on the air and electric lines to take up any slack then close the lid.
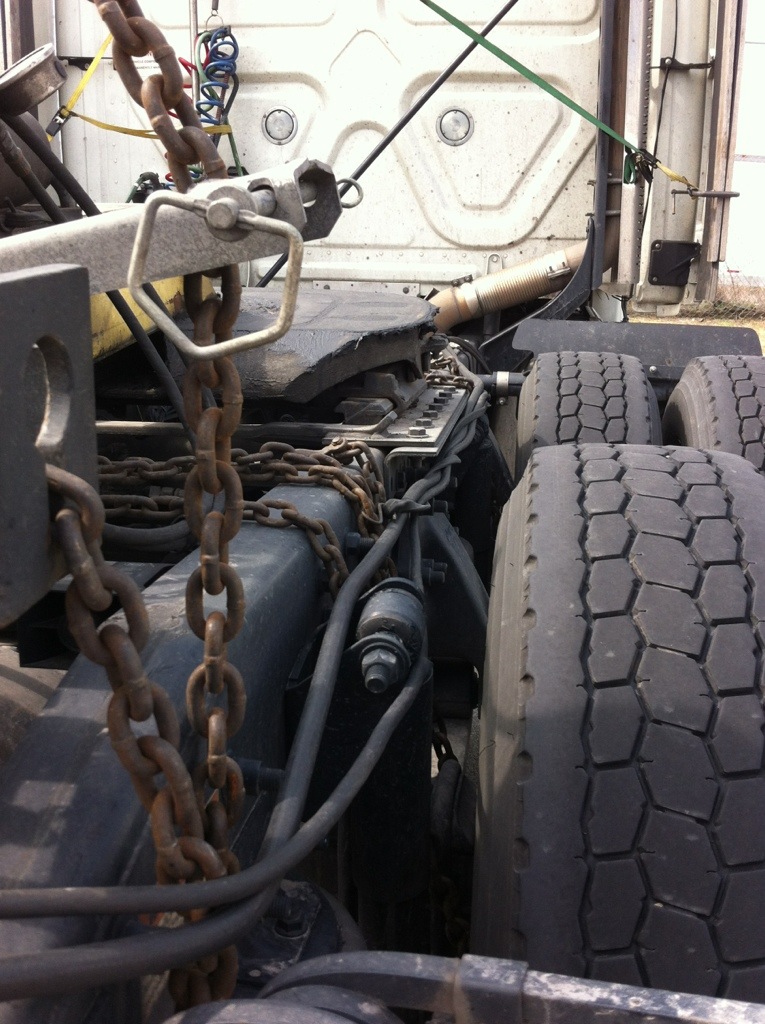
While I am busy with the air and electric lines Joe is chaining up the rear axles. These chains pull the axles up close to the frame. When lifting up the back end of the truck the axles and frame raise as one unit. Neglect to chain the axles and the frame rises higher and higher while the axles remain on the ground. You’ll do it once, even twice, and be wondering what is wrong with the truck. Then it will be…..”Duh”.

The chains are woven under the axle then brought over the top if the frame and connected via the hook.


That was the rear axle being chained. The front axle is the same.


Another forgotten item from the supply list are 2 – 1″ ratchet straps to secure the steering wheel into the center position using the seatbelt first.


Fairing boards and straps are done before the boom is connected to the rear truck. It also makes climbing around on the deck plate easier without stumbling over coiled lines. These photos were taken today while we were unhooking and I was a little pressed for time.
C clamps, hard wood boards and the ratchet straps are on the air fairings of my back truck.


Once that is done it is time to connect the trucks together – 5th Wheel to 5th Wheel.
These are the chains used with the hydraulics. The longest chain has a hook on each end. The short chain has no hooks to be used on the “Yoke” and put through the “Key Holes”. The bitty piece is a double hook used to shorten a chains length.

The hydraulic jack lays over when not in use. Push it upright when hooking up.

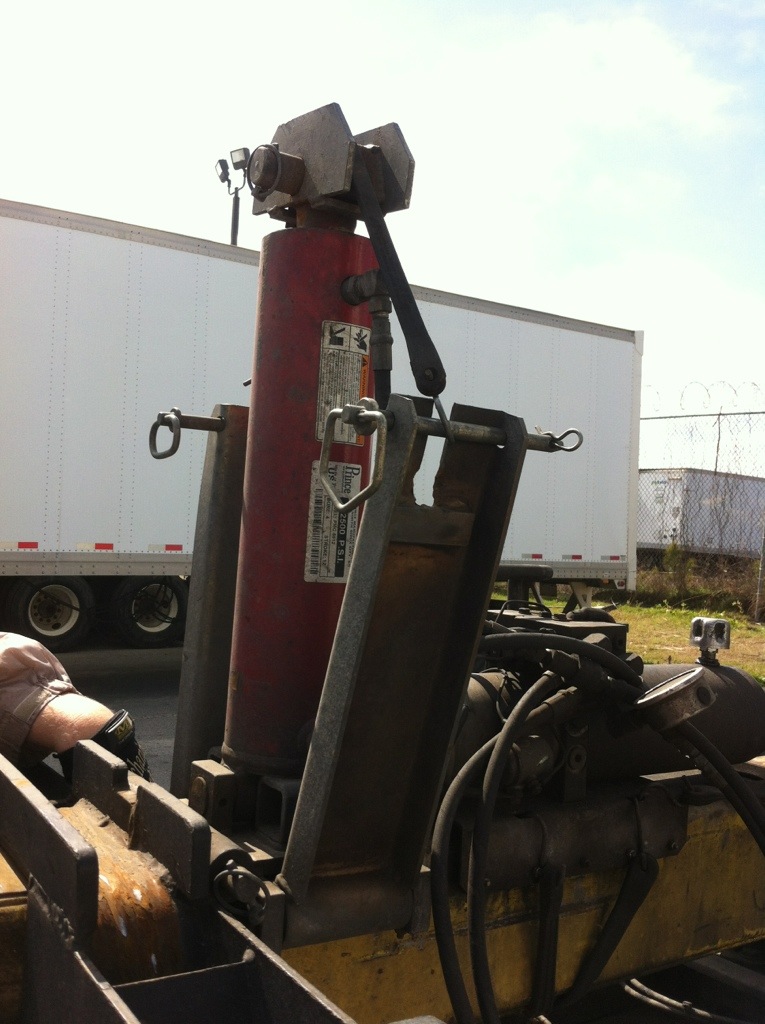
The stabilizing arms are lowered. The 100 Grade chain with “Overhead Lifting” hooks is strung over the jack cradle then connected through the stabilizing arms. The hooks are attached to the trucks frame.

The other chain is placed through the Yoke leaving the chain to hang free. It will be wound around the frame then the ends will go in the key holes AFTER the rear of the truck is raised.
Before that occurs the carry chains have to be shortened using the double ended hooks.

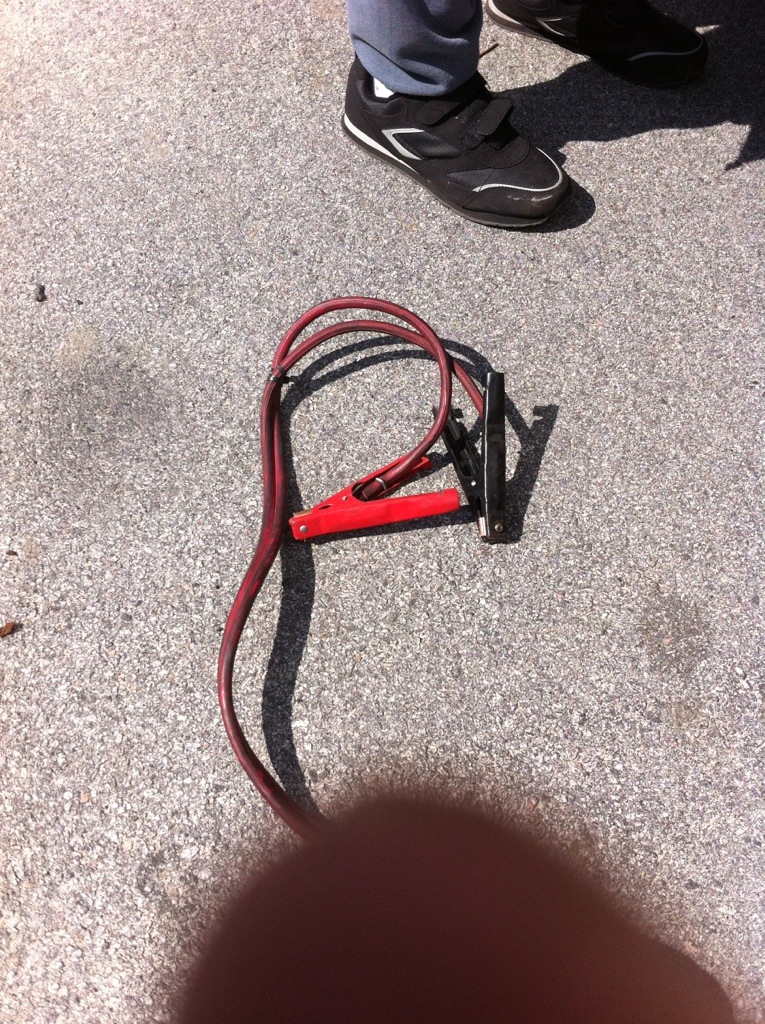
The electric cable is strung out. The alligator clamps are attached to the positive and negative posts of the batteries and the other end is connected to the power cord on the hydraulic pump.


The use of a “Hook Stick” is necessary to work the lever to engage the hydraulic pump. The Hook Stick comes in really handy when working with the axle chains. Getting into tight places to do the job makes this tool hard to live without.


The hydraulic jack raises the rear of the truck. The chains provide the tension to accomplish this.


The safety chains are then placed round the frame, threaded through the key holes and ready for the truck to be lowered and rest the weight on this chain.

The last thing to do in the hook up is secure the air and electric lines, attach them to the Christmas Tree then connect the front trucks air and electric lines.


All of the equipment and supplies shown here are what you get for around $8,000. Plus, you get the added bonus of spending a month of your life with Joe and I as you learn how to safely use and work with this equipment. You will be paid during the time you are with us also.

March 6th, 2013 at 10:34 pm
Super cool. ..I think a mini album to document this would be a treasure! Joe is totally brilliant to figure this boom and trailer out! And your pretty swift too!
March 6th, 2013 at 11:19 pm
You are married to a genius!
March 7th, 2013 at 2:57 pm
That is an awful lot of money and an awful lot of work Leslie.
How strange it seems to see Joe in long trousers 🙂
Love and hugs
Lynn x
March 17th, 2013 at 9:06 am
Thanks for sharing the pics and info.
I hope to be able to get one of those or a trialier.
I am working on reading my new tow vehicle,
while running singles w/my jeep Liberty CRD in tow for now
Garry